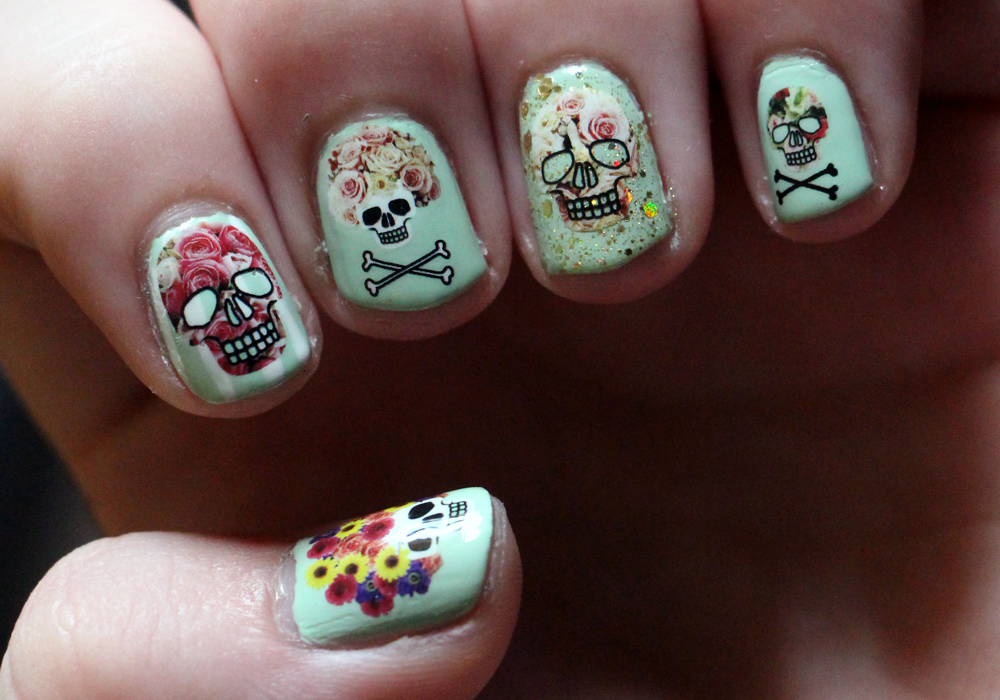
Ever since I first used water decals in my Floral Skull nail art, I knew I wanted to learn how to make my own! After researching it for the past month I’ve finally found out how to make them myself and thought I’d teach you guys! This is much more cost effective than purchasing water decals, and is much more customizable. Oh, so you want a picture of yourself on your nails? Go for it, girl!
You’ll need:
Water slide decal paper, which comes in clear or white.
Clear Gloss Spray (I used Rustoleum)
After you have your materials, photoshop a bunch of images the same size as the paper. Each image was under 1/2 an inch, so that took a lot of images to fill up the 8 1/2 by 11 sheet of paper. Make sure to print out test sheets on regular paper/black and white so you don’t mess up the sizing to be too big!
Once your design is finished, simply spray 3 coats of gloss over it and wait 24 hours before using. The clear gloss protects the ink from washing off.
To apply, cut out your design and place it in a cup of water until it’s fully saturated (under 30 seconds). Pull the decal out and slide it onto your fingertip. I like to put a bit of clear nail polish on my nail to stick the decal in place, because these don’t have adhesive on them! Seal the decals with a top coat and voila!
If you create your own decals, make sure to send me a photo!