Creating fancy designs on your nail doesn’t have to be that complicated! Through my love of blogging, I’ve discovered “water slide decals” from following some nail blogs and I have been enamored with them ever since. One of my favorite online beauty supply stores, bornprettystore, sent me this design and it was love at first sight. Now I must buy ALL of the water decals! (I’m attempting to make my own, but I must practice before doing a DIY!). What a water decals, you ask? They’re basically a temporary tattoo for your nail. Put them over a nail polish, seal them with a topcoat, and they remove easily with polish remover!
Here’s how I applied mine:
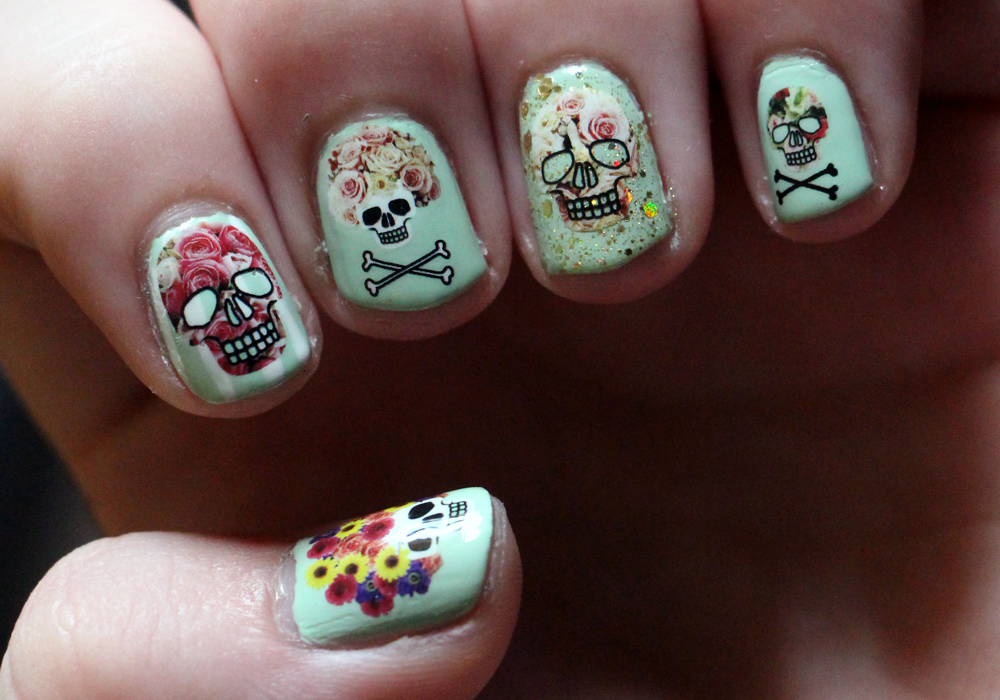
- I used a base coat and Julie G’s Gelato In Venice, a gorgeous mint green, for my base color. I added gold glitter (Julie G Cleopatra’s Cobra) and white nail art stripes to some nails, just to mix it up- I think it adds an interesting background to the design!
- Then, cut out the decals you are going to use, and remove the plastic film.
- Place a decal into a bowl of water for a few seconds (try 10), and fish it out with some tweezers.
- Slide the decal onto your finger, and then apply to your nail using tweezers or your fingers. I had more luck with my fingers. Make sure to remove any air bubbles/wrinkles. You have a few seconds to adjust the position of the decal, so don’t freak out!
- After all of your nails are done, seal them with a top coat. I used Seche Vite and got an incredibly glossy and long lasting manicure. Now you’re ready to get some major compliments!
Hope this was helpful for you guys- I definitely want to create my own water decals soon- I have to practice and see how it turns out! If you think you suck at nail art, try these out, because I think they’re pretty much fool-proof!
Check out BornPrettyStore.com for these decals and many more, they are only $1.99 a sheet, and save 10% with code LMPW10! Happy shopping!

**This post contains a product that I have received for free– for more information, please read my Disclosure Policy**